
A number of edging profiles can be supplied, either factory fitted to Simmons’ epoxy resin worktops or in loose lengths for fitment to other materials. Loose edgings can be supplied pre-cut and mitred at an additional cost.
Epoxy resin grout/adhesive is recommended for fitting all edgings.

Simmons’ standard containment edging for front edges and other seen edges. This edging provides a 10mm dishing and a gloss finish to the outside face. Maximum Length: 3m

A deep front edging with a 7mm dishing, based on the DIN standard for laboratory worktop containment edges. The 37mm depth can be reduced to accommodate other worktop thicknesses. Maximum Length: 3m

A 15mm high edging, often used in the fabrication of fume cupboard bases.
Maximum Length: 3m

A 10mm high edging for use against walls or around fume cupboard bases. Designed for use in conjunction with no.1 front edging.
Maximum Length: 3m

A 7mm high edging used against walls or around fume cupboard bases. Designed for use in conjunction with no.1G front edging.
Maximum Length: 3m

A 15mm high edging available in widths up to 165mm. Maximum Length: 2.5m
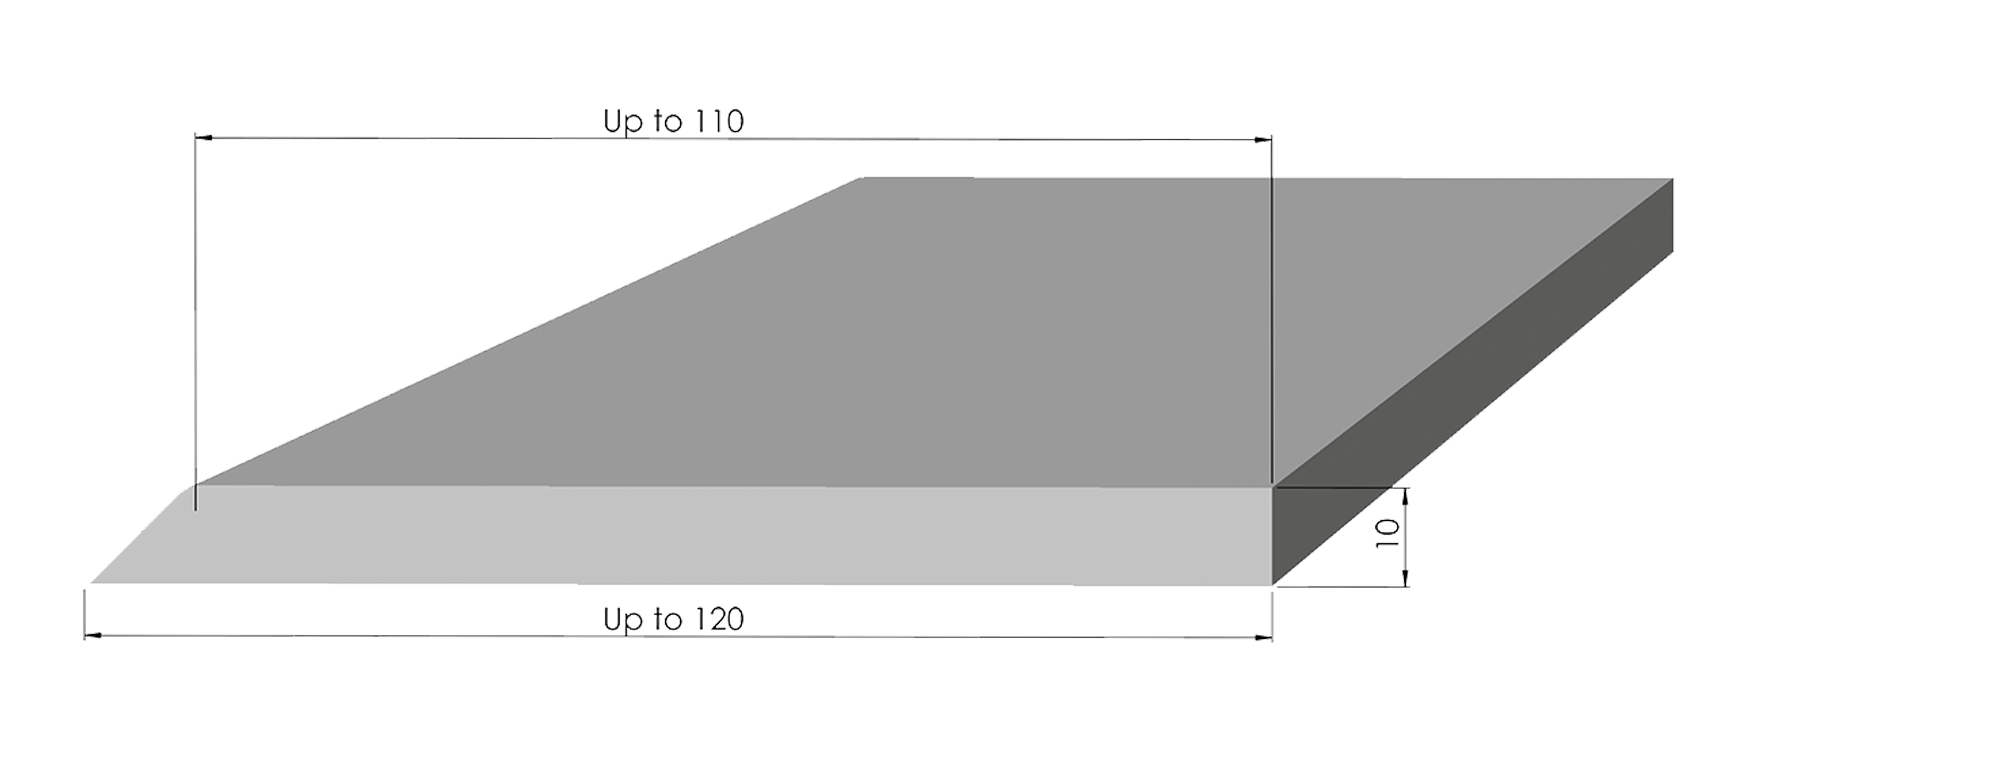
A 10mm high edging available in widths up to 110mm. Maximum Length: 2.5m

With a total height of 40mm and a 15mm bevelled section, this upstand is usually used against walls.
Maximum Length: 3m

Supplied loose with epoxy adhesive for onsite fitment.
Plain upstand is usually used ons against walls and is available at any required height – H, commonly 50mm or 100mm. Maximum Length: 3m
The colours shown on this website are a guide only and cannot be guaranteed to match the colour of components supplied by Simmons.



(24 hour sport test. Based on BS EN 438-2:1991).
Acetone
Unaffected
Acetonitrile
Unaffected
Ammonium Hydroxide – 28%
Unaffected
Aqua regia
Unaffected
Benzyl alcohol
Unaffected
Chloroform
Unaffected
Chloroform – 100%
Unaffected
Chromic acid pickle (*1)
Unaffected
Dicholoromethane
Surface attack
Dimethylformamide
Unaffected
Ethyl acetate
Unaffected
Formaldehyde – 37%
Unaffected
Hydrochloric acid – 30%
Unaffected
Hydrochloric acid – concentrated
Unaffected
Hydrofluoric acid – 40%
Slight bleaching
Hydrogen Peroxide
Unaffected
Methanol
Unaffected
Nitric acid – 70%
Very slight bleaching
Nitric acid – concentrated
Slight yellowing
Nitric acid – fuming
Attack and staining
Perchloric acid – 0.1N
Unaffected
Phosphoric acid – concentrated
Unaffected
Potassium hydroxide pellet (*2)
Unaffected
Sodium hydroxide – 50%
Unaffected
Sodium hydroxide pellet (*2)
Unaffected
Sodium hypochlorite
Unaffected
Sulphuric acid – 70%
Unaffected
Sulphuric acid – concentrated
Surface attack
Xylene
Unaffected
Tensile strength
85 N/mm²
Tensile Modulus
10,500 N/mm²
Elongation at break
0.8%
Flexural strength
112 N/mm²
Flexural Modulus
10,000 N/mm²
Compressive strength
190 N/mm²
Coefficient of linear thermal expansion
34 x 10⁶
Water absorption – 24 hours at 23ºC
5–10 mg (0.06–0.068%) ISO 62 (1980)
Thermal Shock
2000 cycles (90 sec. at 75ºC, 90 sec. dwell, 90 sec. at 15ºC)
No effect
Should not be used with dry-ice or liquid nitrogen
Smoke Emission
Low Smoke Emission – BS 6853 1999 App. D Clause d.8.4
Result – Ao(on) 8.75, Ao(off) 10.41
Flammability
Class 0
Thermal Decomposition
350ºC
Glass transition temperature (Tg)
120 – 130ºC
Decontamination factor (geometric mean)
5598.0
Deviation factor
1.25
Ease of radioactive decontamination classification
"Excellent"
As with all worktops a reasonable standard of laboratory housekeeping will help to keep the worktops in good condition. All spillages should be cleaned up as soon as possible. Staining agents and aggressive chemicals should not be allowed to sit in contact with the tops for a prolonged period of time.
Areas of chemical attack or staining can be removed with a polishing compound or very fine abrasive paper, but it should be stressed that this will alter the finish of the surface. Performance will not be affected.
The use of a wax furniture polish will help to retain the gloss finish.
Components should not be exposed to dry-ice or liquid nitrogen and heat insulation pads should be placed between a top and a steambath or hotplate to prevent thermal stress.
List of Tools and Equipment required:-
All edging and upstand should initially be dry fitted to check for size and fit.
Minor adjustments can be made using 80 grit sandpaper.
The underside of the edging or upstand and the area onto which it is to be fitted must be rubbed down with sandpaper and then with cellulose thinners.
Both components have a coating of release from the casting procedure which will prevent anything bonding to it unless this coating is removed.
A mix of grout should then be prepared as described above. When completely mixed this should be applied in a thin layer to the underside of the edging/ upstand. The edging should then be placed in position and securely clamped down (using blocks to protect the surface of the edging). This will squeeze out any excess grout which should be removed with a sharp flat chisel when it becomes rubbery. After approximately 10 – 15 minutes when the grout has fully hardened the clamps may be removed.
It is important that a radius fillet of grout is applied to the joint between edging and the worktop so as to ensure that there is an easily cleanable and fully sealed joint. A fresh mix of grout should be prepared as described above.
When completely mixed this should be applied along the joint using the wooden sticks provided. A final run around with the radius end of the stick will give a tidy finish. When the excess grout becomes rubbery it should be very carefully removed using a sharp flat chisel. Approximately 1 hour after this the joint can be wiped down with cellulose thinners.
This radius fillet is not required with flat sheet upstands which meet the top at a 90° angle.
Grout is supplied as a pack of two components :- resin and hardener. Once mixed the grout has a workable life of approximately 5 minutes. It is therefore essential that only a manageable amount of grout is mixed at one time, and that all preparatory work is done before mixing.
The resin and hardener should be measured out at the ratio stated on the containers onto a mixing board. When ready for use this should be thoroughly mixed using the wooden sticks provided until the two components are homogeneous.
Please note that a minimum room temperature of 5°C is required to initiate the cure cycle for the grout. The useable life of the grout will vary with the ambient temperature. The warmer the room the quicker the reaction.
It is recommended that Latex gloves are worn whilst using epoxy resin grout components and cellulose thinners.